Typical Brew Day
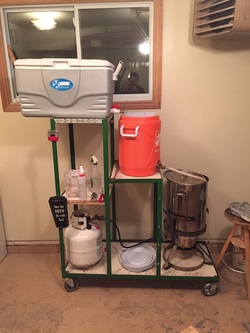
These instructions are for one 5 gallon batch using a three tier gravity fed system using the batch sparge technique. I use a home depot cooler with a bazooka screen for the mash tun, a random square cooler for the HLT to hold the sparge water and a stainless steel propane fired turkey fryer I 'borrowed' from my dad for the boil kettle.
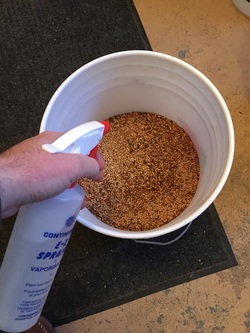
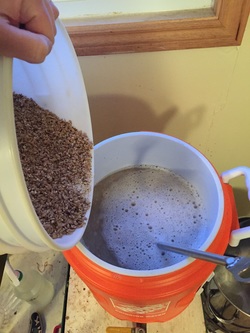
I like to weigh my grain out the day before so it's ready to go on brew day. I always condition my malt by spraying with water until it's slightly damp, it helps keep the husk intact which aids in draining and keeps the dust down when milling. Give it a few minutes rest before milling. You know you did too much if the grain flour sticks to your mill rollers.
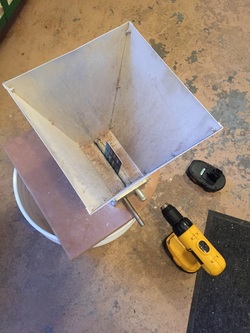
Time to mill, mine is set to 0.035" or the thickness of a credit card which you can see stuck between the rollers. Use a good drill on the low speed setting. Slap the mill on a 5 gal bucket and have at it, pouring from the conditioned malt bucket. It takes two batteries on my trusty Dewalt 18v. Should only take a few minutes and I like to do it right before brewing the same as I grind coffee fresh before brewing a pot.
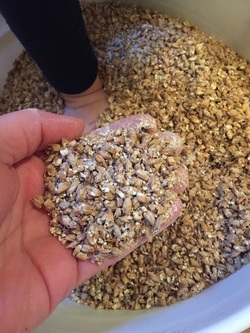
This is roughly what it should look like, nice big chunks of husk and grainy white insides with minimal flour like powder. My little guy was helping test in this shot.
Get your water ready now. I treat my water with salts every time which is explained on the water chemistry page. 3.75G is the perfect volume of mash water for my little Home Depot cooler with a 9-13lb grain bill.
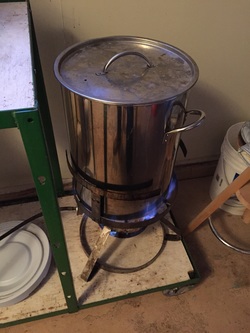
Heat the sparge water now. Make sure that you have really good ventilation if you're using a propane burner in your garage like I do.
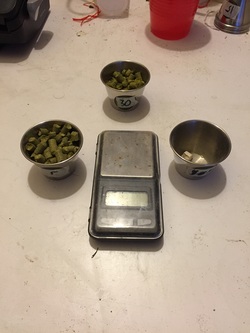
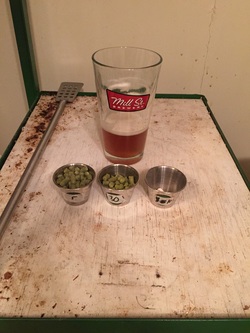
As the mash water is heating I like to get my hops ready. A 0.01g resolution jewelry scale is perfect and those little cups are from the dollar store. Mark your addition times on the cups to avoid confusion. Whirlfloc is in the one on the right. I usually pull my yeast out of the fridge now too, to let it warm up.
Heat your sparge water approximately 10C higher than you'd like to mash, 76C usually works for my setup but will vary depending on how much grain you've got and how cold it is in the garage.
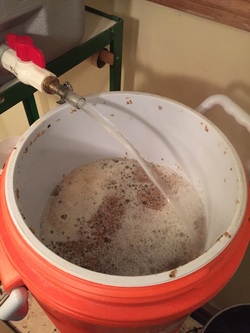
Once you've reached your strike temp, pour the water in the cooler and start adding the grain. I stir constantly as I add making sure to break up balls of grain so it's nice and homogeneous. A stainless steel mash paddle is nice for this.
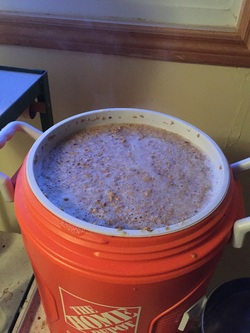
Should look like this when all mixed in. A nice thin mash will help with efficiency and conversion.
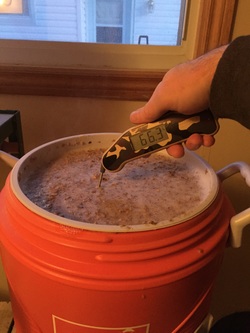
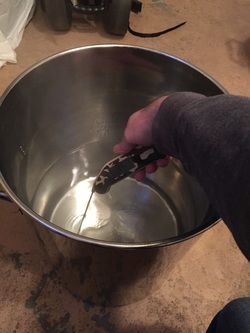
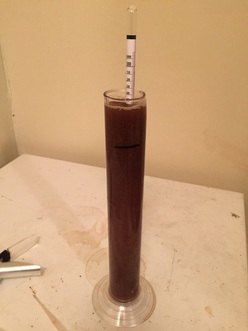
Check your temp right away. You're aiming for 63-69C. The lower end of that range will make a dryer beer that finishes at a lower gravity, and the opposite happens near the other end with a less fermentable wort that finishes with a higher gravity. You can see I hit 66C roughly, which is where most of my beers end up right in the middle with a 10C drop from the strike temp. (Highly recommend getting a thermopen like the one in the pic).

Now it's time to hurry up and wait. Throw the lid on and let the enzymes do their thing. 60 min mashes are common, but I do 30 min mashes to save time. You can check to see if the grain is done converting by taking samples and adding a few drops of iodine. Dark blue means there's still starch, no color change means conversion is done and you could technically start collecting the wort.
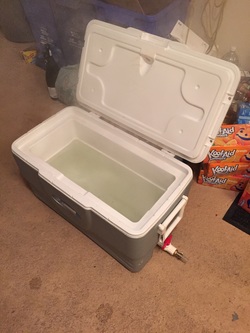
While the mash is happening, I get my sparge water ready. Usually exactly the same as the mash water, 3.75G with the same salt treatment. 82C seems to be a good sparge temp for me, so once the water reaches that, I dump it in my HLT cooler and put it on the top shelf of my stand. My grain bed raises to 68-72 after adding water at this temp. It's cool because it's like doing a two step mash favoring the high end of the conversion range for the sparge to let the alpha amylase have a go at the sugars.
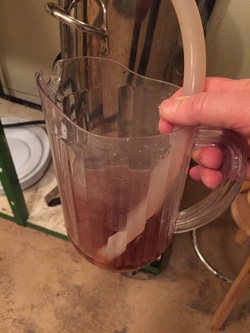
Once you're ready to sparge, vorlauf a pitcher full of wort and pour it back on top of the grain bed. This clears the fine bits out of the wort and helps set the grain bed for better draining.
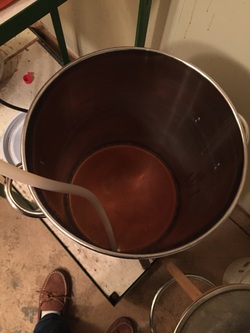
Drain all the wort you can out of the mash tun with the valve about half way open. Full tilt will probably end up in a stuck sparge. Should take about 5-10 min.
Once the mash tun is drained, close the valve and fill it back up with the sparge water from the HLT. Give it all a good stir as it's filling up and let it sit for a minute or two before vorlaufing again and draining it completely same as before.
You can see the whole process in motion here with everything flowing by gravity. Stop sparging when you've reached the right volume in your boil pot. I usually end up with the right volume without stopping or adding any extra water. Check your gravity when you're done and see how far away from your predicted OG you are. Should be roughly 8 points give or take lower which will increase as you boil and the water evaporates, concentrating the wort.
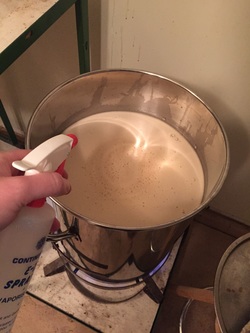
WATCH FOR BOIL OVERS! Heat the wort to a boil and watch really carefully as it reaches the boiling point. Turn the burner down as soon as you see bubbles and get a spray bottle ready. The spray will knock the foam down and everything should settle down after a minute. You want a good rolling boil without excessive foam.
Have your hops ready nearby to add to the kettle. A pint always helps a brew day go smoothly as well.
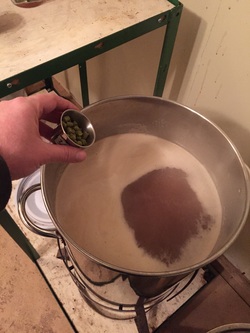
Add your bittering hops and start your boil timer. 60 minute boils are common, I do 30 minute boils to save time at the cost of a little more hops to get the same bitterness. Add the rest of your hops if you have any in the recipe, at the times specified as the boil proceeds. I toss whirlfloc in at roughly 10 min left every batch to help with clarity.
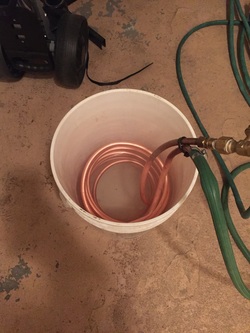
While the boil is going, get your chiller ready and hooked up to the cold water tap. When it's warm out I use the garden tap and run the outlet to my lawn or the ditch. A soak in powdered brewery wash will get it nice and shiny like mine. Put the chiller in the boil pot at around 15 minutes left to sanitize it. Crank the burner as you add it, holding with an oven mitt (it gets hot) otherwise you'll kill the boil. Turn the burner back down once it's in and everything's back to where it was.
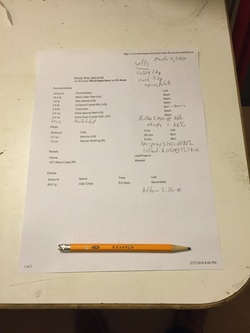
Writing everything down is really important, otherwise you'll never know how you made that killer batch or why it tasted like socks.
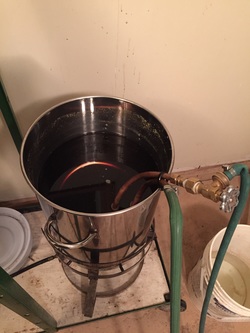
Once the boil is done, kill the burner and start the water flowing through the chiller.
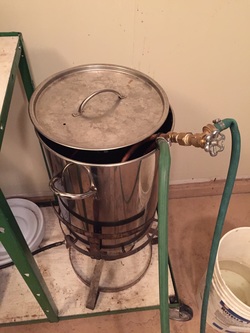
Put the lit on to keep the nasties out and give it a stir with the chiller every 5 min or so to speed up chilling. Usually takes 15-20 minutes with a 25' copper coil. Sanitize your carboy, siphon, funnel, O2 stone, etc in star san now so it's good and clean when chilling is done.
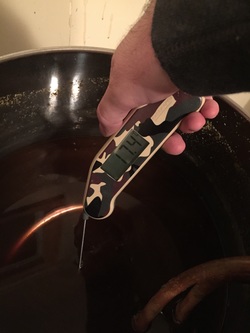
After sanitizing the thermometer, check the temp of the wort until it's 20C or lower. I had cold water this brew day so got the 17C pretty quick.
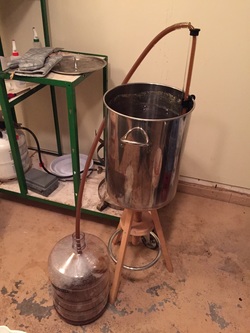
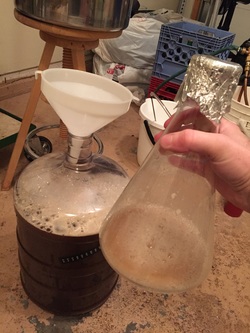
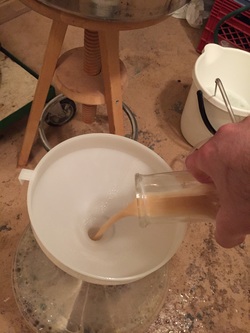
Once it's chilled, use your sanitized auto siphon to transfer the wort to the carboy. Fill it pretty close to the top and don't worry about any junk making it to the carboy, it doesn't matter.
Remember to take a hydrometer reading to see how close you got to your predicted OG. I usually get efficiency of about 75%, but it totally depends on your system and may vary.
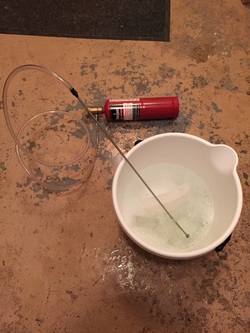
I use pure oxygen and a stone mounted on a rod from OBK to oxygenate the wort. The regulator is from Hop Dawgs. You can skip this and just shake the snot out of the carboy but I'm lazy and this is much less effort for the same outcome.
Put the rod in and turn the gas up just until it starts to bubble. Then stir it around in the wort for 60 seconds to oxygenate everything evenly. Crank the gas as you pull the stone out to clear it of beer and sanitize right away so it doesn't get clogged. I boil my stone every few batches to sanitize in case there's any nasties growing inside the little pores. If you're shaking, 5 min is good enough. Rocking it on a tennis ball on the floor is a good technique.
Now it's time to pitch your yeast. Swirl it up really well so none is stuck to the bottom and make sure your stir bar is removed. I usually make a 1.6L starter, save 0.6L for the next bactch, then pitch the remaining 1.0L. The starter is cold crashed in the fridge and about 3/4 the liquid on top of the settled yeast is poured off before pitching. More about this on the Yeast Culture page.
Make sure the funnel and mouth of the flask are sanitized with star san, then pour the yeast in the carboy. With dry yeast, sanitize the packet and scissors, cut the pack open and sprinkle in the carboy directly.
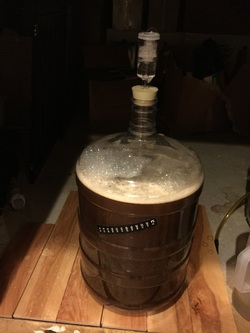
Put the sanitized air lock on, and store in a cool dark place for 10-14 days. Fermentation should take off roughly 12-24 hours later depending on how cold it is. My crawl space is perfect for this, and keeps the beer around 16C when not actively fermenting, and as high as 20C when really rocking. I leave it in the crawl space for 3-4 days until fermentation is slowing, then move it out to the shower in the basement where it's slightly warmer to finish off. The goal here is to keep it under 22C the entire fermentation without big swings in temperature. Letting it warm towards the end of fermentation helps the yeast finish fermenting and clean up after themselves to avoid off flavors.
This is how I do it, you'll see that there's several different ways and setups to achieve the same thing if you look around online. I will be switching to brew in a bag with a larger pot soon since it seems to be the easiest way to make beer in the shortest time with the least equipment. We'll see how that goes and write another page about it if it's cool.
