Idea for this design is ripped off from my buddy Brad. Here's how to build a kegerator that will increase your beer consumption 2000%. Enjoy your beer gut.
|
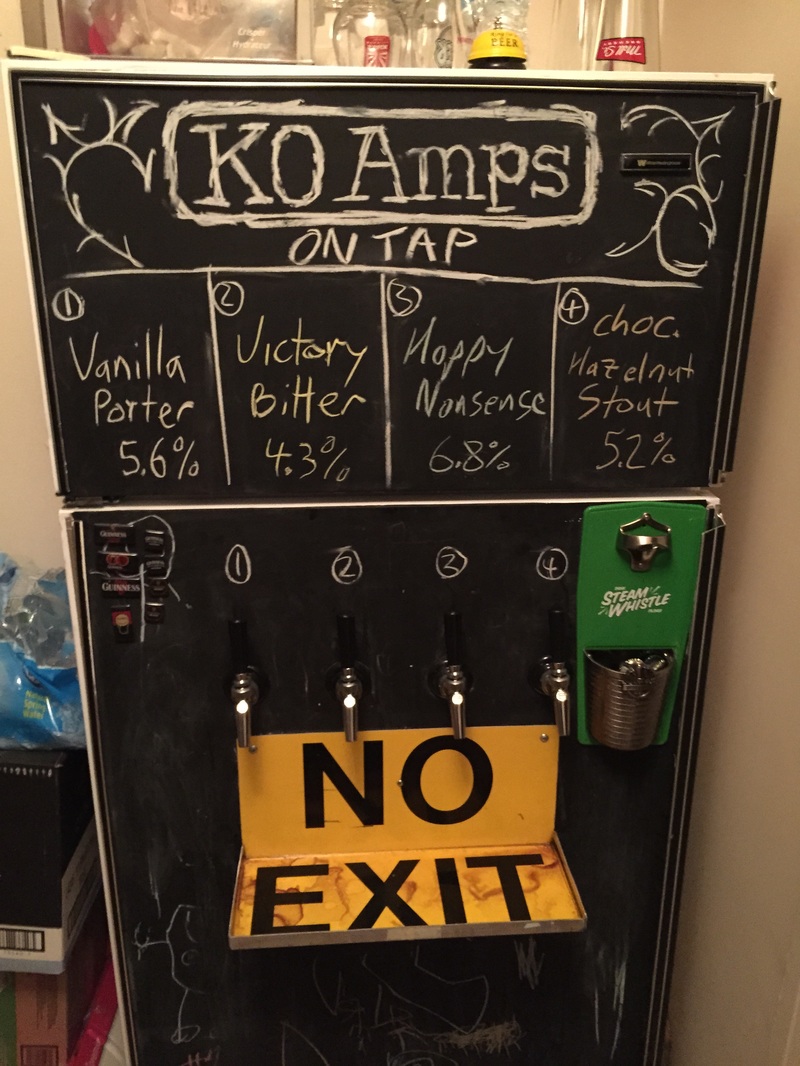
Get yourself a fridge, free or cheap is good, check kijiji. Make sure it's big enough to hold a few kegs, mine is 30" wide by 28" deep and about 64" tall. I sprayed mine with chalkboard paint which increases it's awesomeness dramatically. Started with one tap, be careful they multiply quickly. OBK is the best source for everything. Highly recommend stainless steel shanks tail pieces and Perlick taps. You'll end up buying them later anyways because they're awesome.
|
|
Check inside the door and make sure the area near the top is fairly flat and there's room for the shanks. Plan ahead for how many taps you will have and make sure the handles will clear the freezer door opening in the front before you drill. I spaced mine 5" apart which looked nice from the front.
|
|
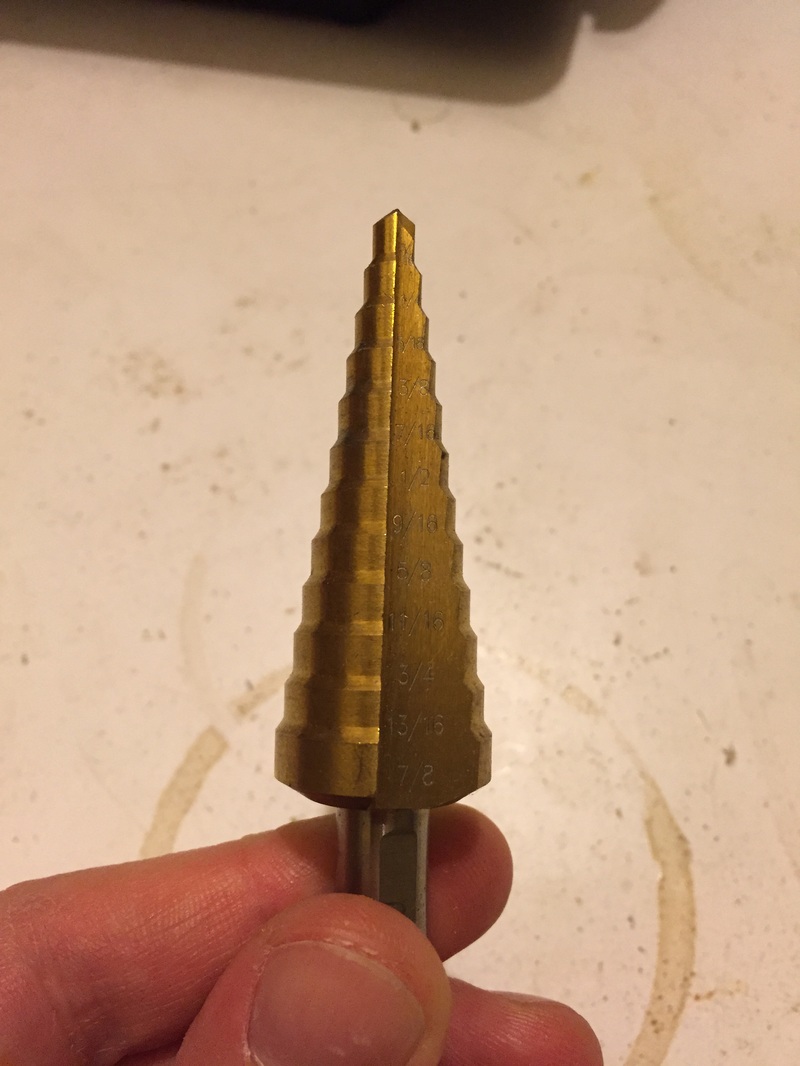
Now it's time to drill. Measure 12 times, can't cover up boo boos and nothing's worse than crooked or unevenly spaced taps. Mark where you want to drill, it helps to drill a pilot hole with a small drill bit first. Then use a stepped bit to drill a 7/8" hole. You'll have to do the front and back separately due to the door thickness, which is where the pilot hole comes in handy if it went all the way through.
|
|
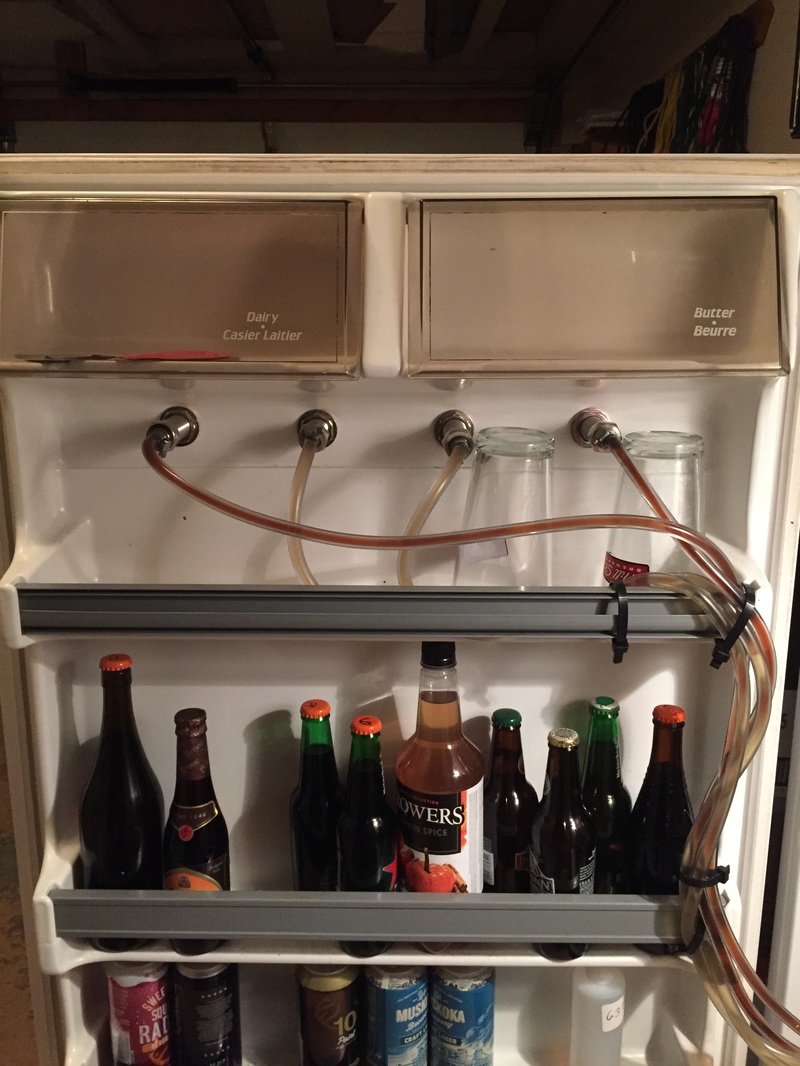
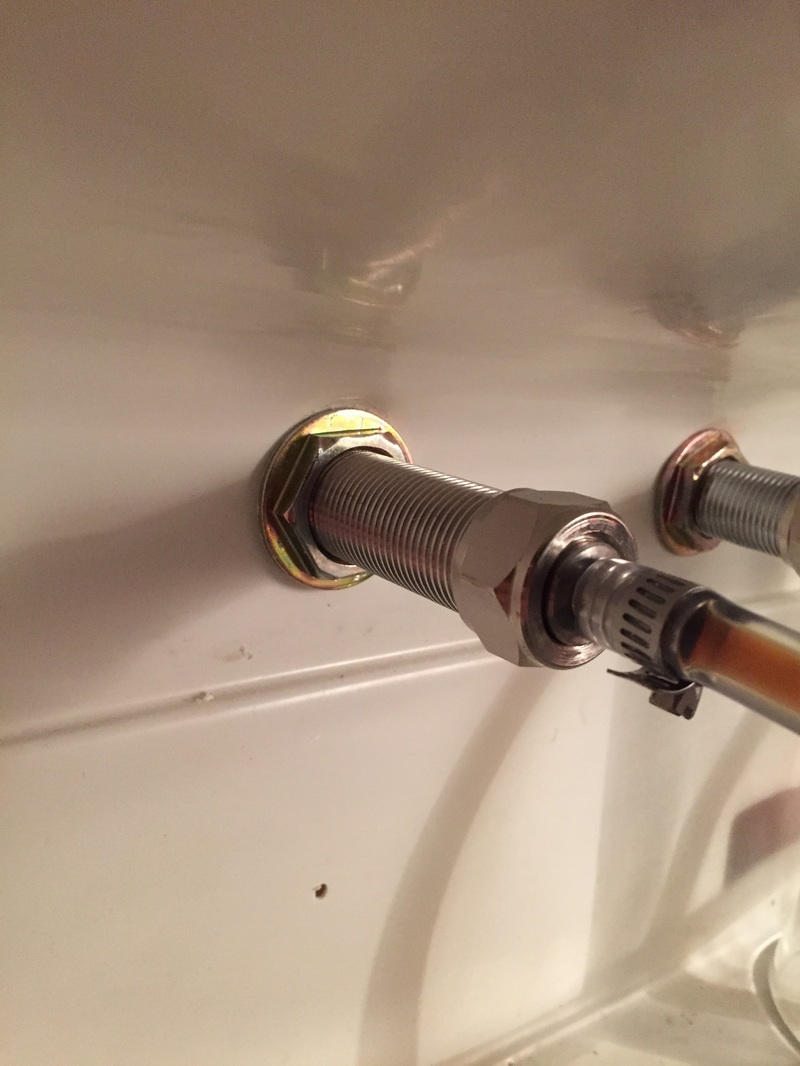
Thread the shank through your hole. Tighten the nut snug for now. Later you'll attach the beer line to the tail piece and screw it on to the end of the shank. Put keg lube on all rubber connections and o rings.
|
|
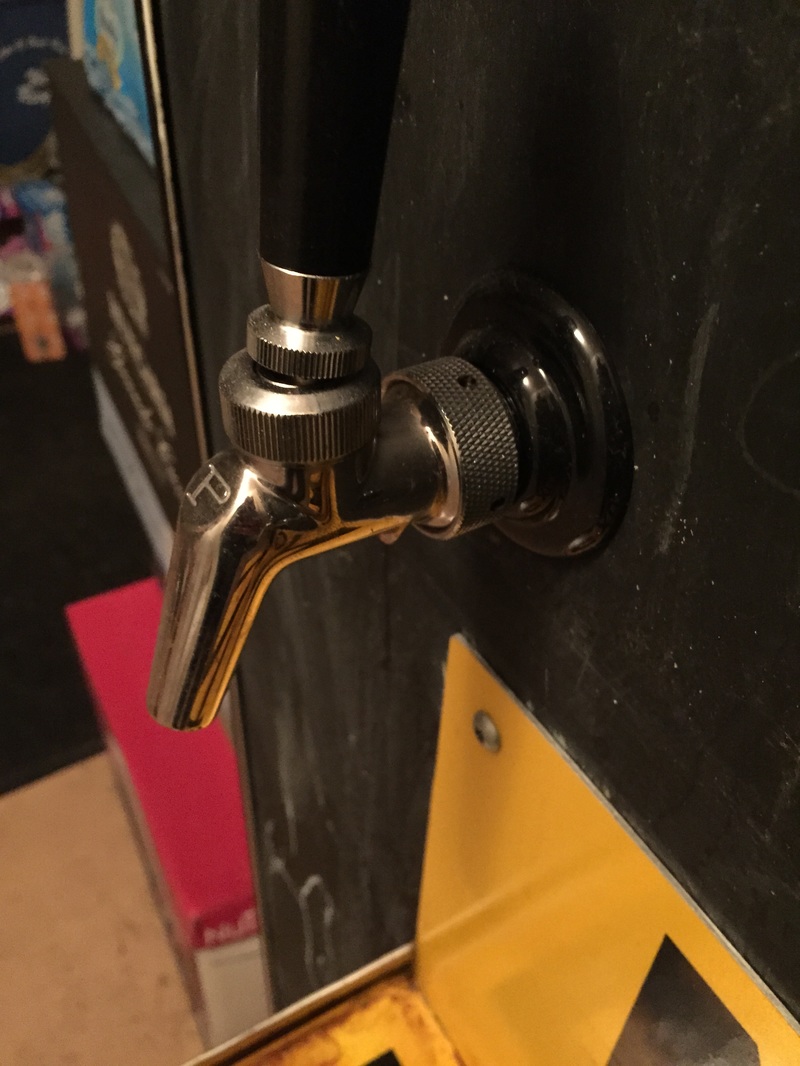
Screw the taps on next, again making sure to keg lube all the rubber while assembling the tap. You can use one of those tap wrenches or a pair of channel lock pliers to snug it on, but easy does it. Tighten the nut on the shank inside just until the tap won't turn side to side easily but don't crack the plastic inside.
|
|
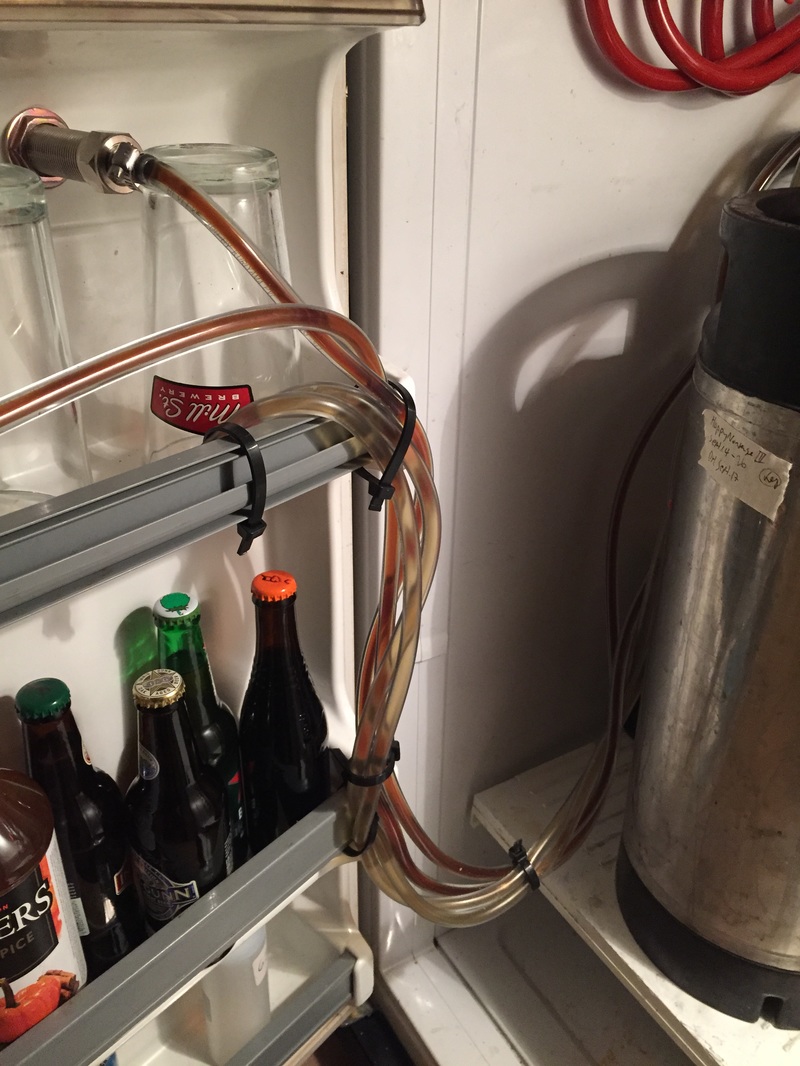
Connect all the Bevlex tubing to the tail pieces and secure them to the shanks. Attach the liquid keg connects to the other end of each, I've got 6' long lines and pin lock kegs. Number the connects so you can keep each one straight when hooking up the kegs. Then neatly bundle the tubing together and run it over near the hinge of the fridge door so they don't get pulled when you open the door.
|
|
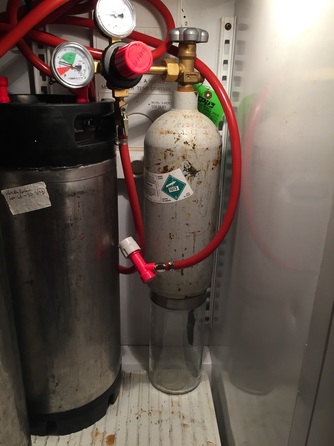
Now it's time for the gas side. This is what pushes the beer out of the kegs and keeps them carbonated. I've got a 5 lb tank that lasts 10-12 kegs and fits nicely in there with them. Attach the gas line to the regulator, then screw the regulator onto the tank. Tighten the brass nut fairly tightly with an adjustable wrench while supporting the weight of the regulator with your free hand. You'll run the one gas out to a manifold to split the gas to each keg.
|
|
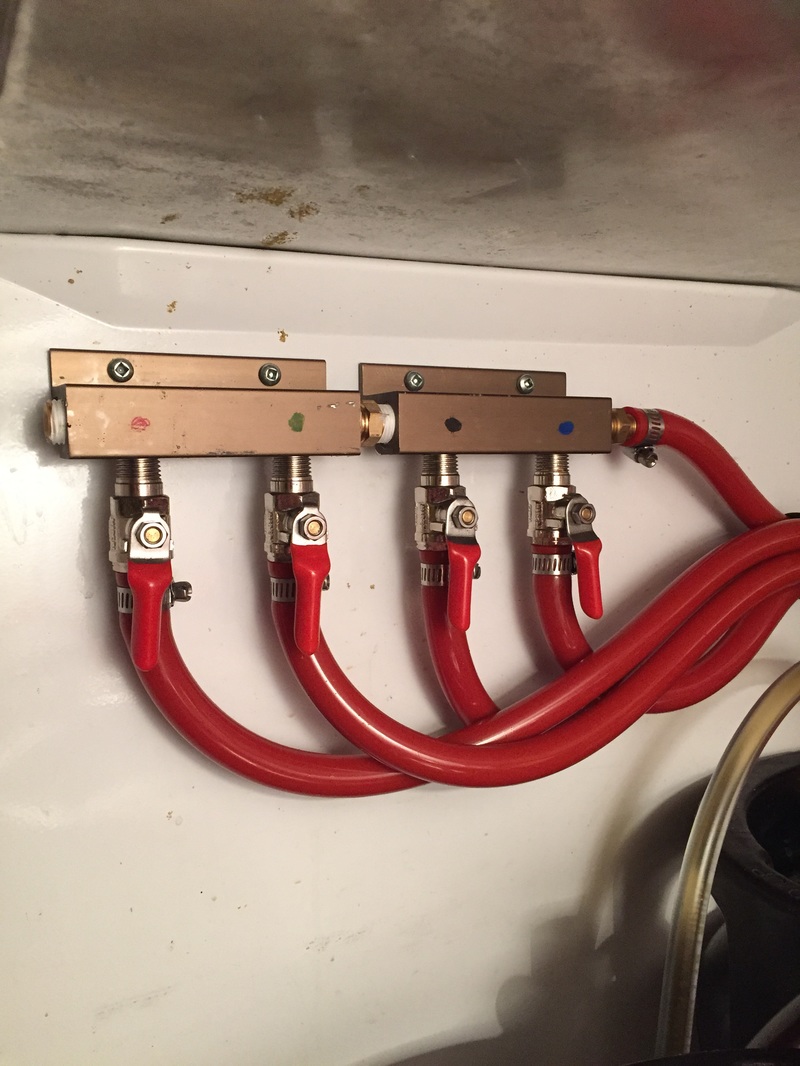
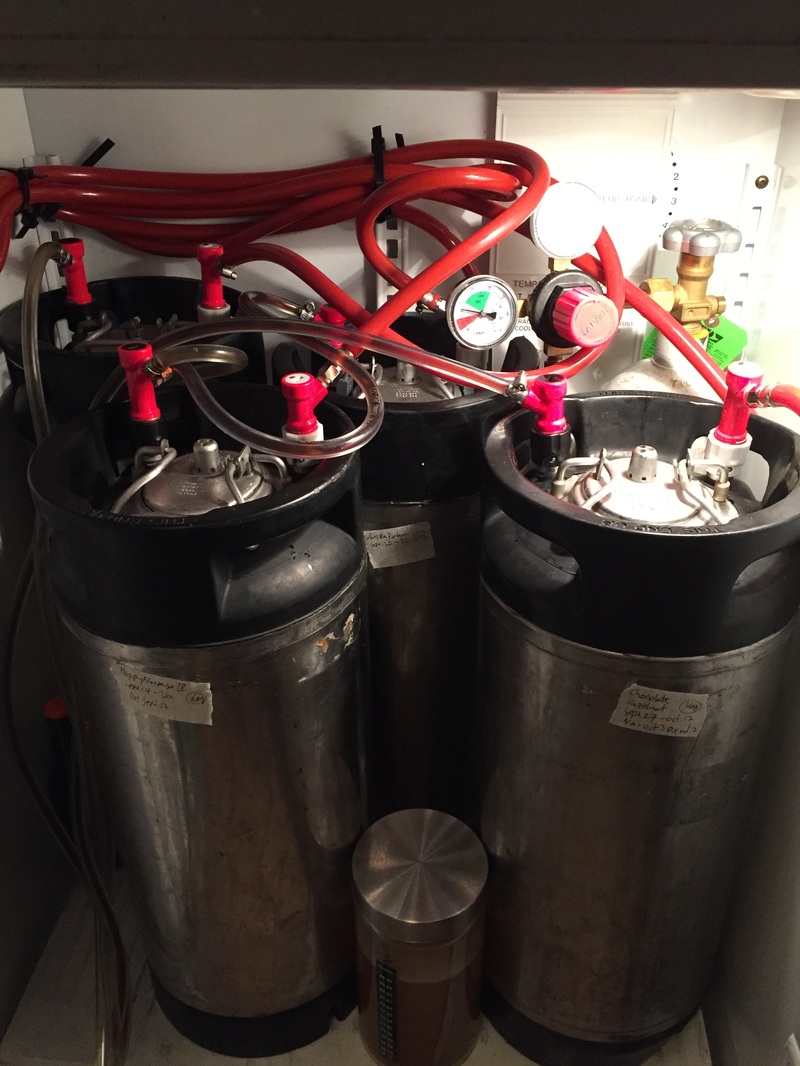
You can see here I started with a 2 out manifold and upgraded later screwing on a second double out one which was a giant pain in the ass (notice all the Teflon tape). Here is where you want to tape all the threads to stop leaks. The far right is the tube from the regulator with the gas in, each shutoff goes to one keg. I color coded them to keep things straight. The other end of each gas line has a gas keg connector on it. Secure it to the side of the fridge with short screws, where it's out of the way of the kegs and you can reach it.
|
|
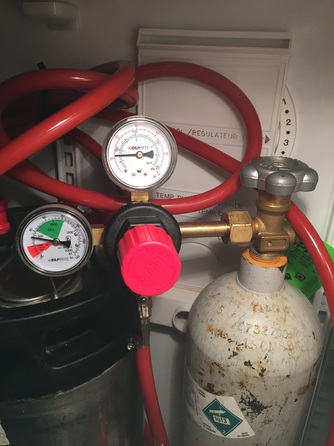
Here's a closeup of the regulator. Left dial with the red and green is the tank pressure, mine's about 600psi full and cold. The other dial is how much you're letting out to the kegs and is adjusted by the big red knob on the front. When you're hooking it up the first time unscrew the red knob all the way (lefty Lucy), slowly open the main cylinder valve all the way, then tighten the big red knob to increase the pressure. 10-12 psi is the recommended serving pressure.
|
|
After this you're ready to leak test everything without kegs attached. It's hard to keep all the tubes looking neat, so bunch them together the best you can. You might have to strengthen the bottom of your fridge to hold the weight of the kegs, I got lucky mine was fine. Use soapy water on all the connections and keg fittings. If you see bubbles, go back and tighten that connection. Once there's no leaks, hook up the kegs and test all the connections on each one, especially around the lid and posts.
|
That's about it, the worst that can happen is a gas leak and an empty tank the next day, so leak test thoroughly. You can force carb your beer in 48 hours by cranking up the pressure to 30 psi for the two days. Just remember to disconnect the other keg gas lines from their kegs and shut off the valves for all but the one on the manifold (mine leak past the shut offs a little and over carb the other kegs). Purge the excess pressure once it's carbed, lower the pressure back down to 10-12 and hook everything back up after. Remember to purge the airspace in the top of each keg when you're first putting them in to get rid of oxygen, 2-3 purges is good.
Clean your kegs with an overnight oxyclean soak when they're empty, and remember to put keg lube on all the rubber o rings for the best seal. Every month or so you'll have to clean the lines to keep things from tasting crappy. Fill a keg with a gallon or so of line cleaner and push it through all the lines, letting each soak for 10-20 minutes. Run lots of sanitizer through after to flush out the cleaner before hooking back up to the beer.
In town the place to go for a CO2 refill is Praxair. They only do tank exchange and it's around $35-40.
It is possible to put the CO2 tank and regulator outside your fridge as well. I've always had it inside since there was room, it looks good and was simple. If you have your tank outside it will free up room in the fridge and allow you to get a bigger tank that needs filling less often. You will have to drill a hole through the side of the fridge to run the gas line in though. Be super careful doing this because most fridges have refrigeration coils in the sides, and if you hit one your fridge is toast. Operation wise inside or outside it's the same difference, they both work well. (Thanks to Barry for reminding me to include this info).
Don't get tempted to cheap out and get chrome plated brass taps or shanks. The chrome will flake off and you'll get a nasty tinny metallic taste from the brass which will eventually pit and could harbor bacteria. The standard style taps are crappy too, they stick and attract fruit flies if you don't use tap soothers.
Keg style doesn't really mater, the only difference between ball locks and pin locks is size (pins are short and fat, balls taller and skinny) and ball locks have a pressure relief pull valve on their lids which is a bit more convenient. I like my pin locks because of the connects, you'll never confuse them due to the different number of pins on each post (gas 2, liquid 3). They're usually cheaper too. Safest bet is to get the pressure tested reconditioned ones from OBK.
Get a drip tray too, make sure it's wide enough to cover all your taps. I made my own from an old street sign.
This is an expensive project, all the stuff to make my fridge probably cost around $800-1000 all said and done. Kegs are super awesome though, one container to clean so you're done in 5-10 minutes when you would have been bottling for an hour or two. No over carbonation (unless you're a meathead), and super quick turn around, drinking beer as soon as 10 days after brewing. Plus your house will suddenly turn into the favorite hang out spot for all your friends and neighbors.
